Living with the GA-Z97X-UD5H Motherboard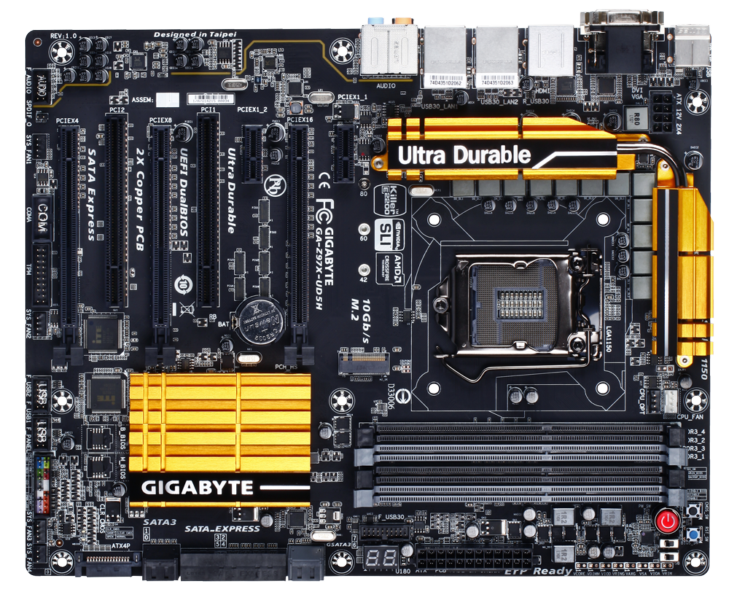
One thing that I like to do before getting a new motherboard is to read reviews. However, most reviewers only run the board for a few hours or days, cover the basics and then give their verdict. They never seem to encounter issues with software or niggles with hardware or, if they do, they don’t mention them. I don’t want to do that with this article and hope to give a better picture of the day-to-day running of the GA-Z97X-UD5H which I am going to use as my main PC.
I didn’t jump on the Z87 bandwagon when it first rolled out as I felt my existing i5 2500k Sandy Bridge CPU and Z77 motherboard were doing a good job. Also I couldn’t really afford to upgrade and this is a situation that faces many of us. So I waited but, a few months ago I got hold of an i7 Haswell CPU and to use it, I needed a new motherboard. This was around the time that early hints of the upcoming Z97 chipsets and new motherboards were being posted on-line and a decision was made to wait until the new motherboards came along rather than to buy a Z87 based motherboard.
As I stated before, cost is an issue with this build and I didn’t want to throw lots of money on new components, so I have recycled parts from my previous system to get this new build up and running. This is something that a lot of home PC builders do and is probably why we seem to encounter more issues than if we were building from scratch.
So, what’s being used in this new PC?
Motherboard: Gigabyte GA-Z97X-UD5H - New
CPU: Intel i7-4770K Haswell - New - The CPU is being cooled by a water cooling loop, which really helps to keep the temperatures down.
RAM: Corsair Vengeance 16Gb Kit 1600MHz 9,9,9,24 – Previous Build
PSU: Gigabyte Odin 850 Watt – Previous Build
GPU: NVidia GForce GTX 650 – Previous Build
Storage: Plextor M.2 PCIe SSD 256 Gb – New – Check out my review for this item here: ,Corsair Force SSD 256 Gb, Western Digital Caviar Black HDD 640 Gb, Pioneer Blu-Ray Burner – all from Previous Build
Monitor: Dell 27” U2713HM (Digital) using DVI connector and screen resolution of 2560 x 1440 – Previous Build
Input Devices: Microsoft Mouse and Keyboard connected via USB – From Previous Build, Logitech T650 Touchpad - New
Webcam: Logitech C910 – Previous Build
Speakers: Logitech 5.1 System – Previous Build
Other Used Items: Axiom 49 Midi Keyboard, Roland Duo Capture EX, USB3 HDD Dock, various USB pendrives.
Operating System: Windows 8.1 Pro 64 bit – New
The GA-Z97X-UD5H motherboard is a stunning piece of equipment to look at and too hold. It feels solid and although the Gold heatsinks will not be to everyone’s taste, they are not as yellow as the publicity pictures make out.
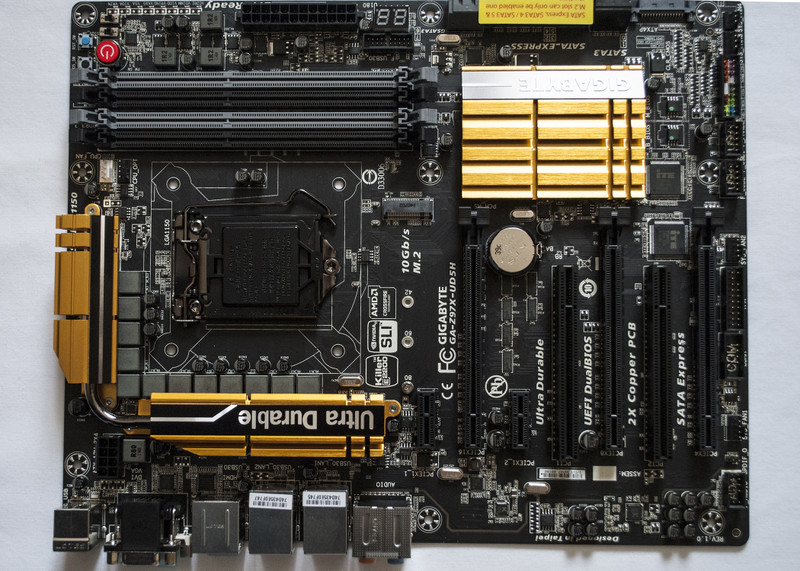
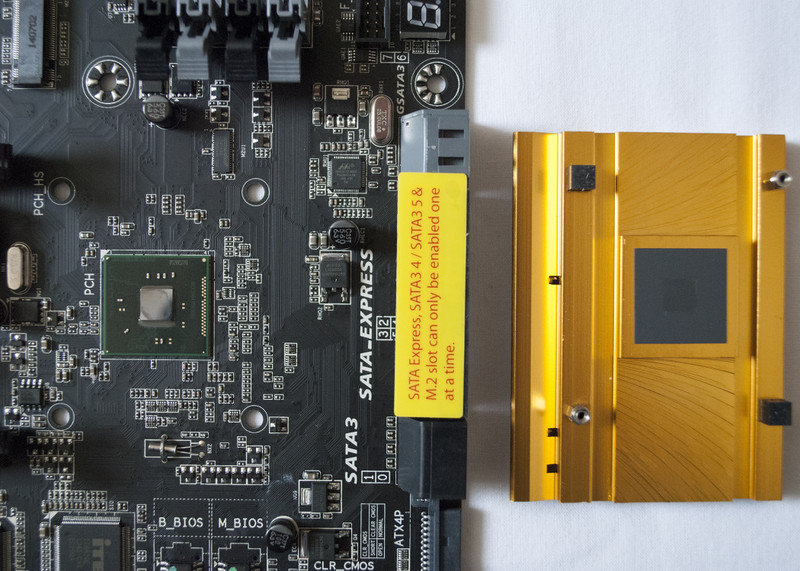
A question I have often been asked is: “What’s under the heatsinks and can they be easily removed?”. On this motherboard, the answer to that is yes, they can easily be removed, as each of the heatsinks are held on by two screws from the back of the motherboard.
The PCH (Platform Controller Host) Chip is in the lower right hand section of the motherboard and has grey thermal paste on it,
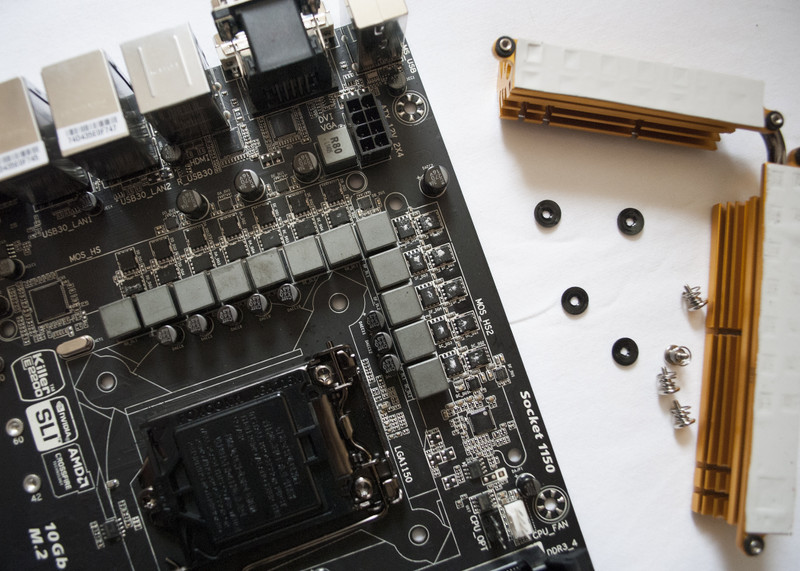
whilst the two heatsinks covering the PWM area are linked by a pipe and have strips of thermal pads.
The Audio area of the motherboard is separated on the PCB layer and is marked out by a line on the motherboard. This is not as noticeable as the publicity shots make out but can still be seen.
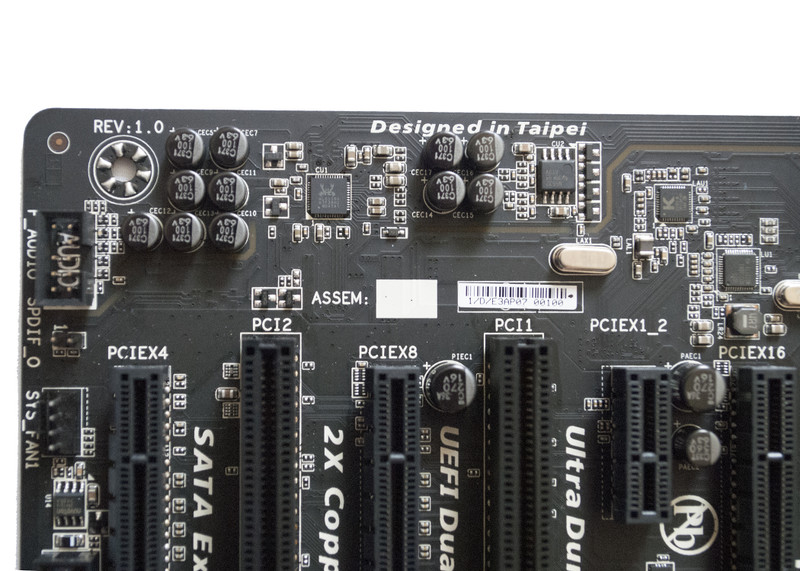
Apart from the CPU Fan Header, next to the CPU Socket there is also a CPU_Opt fan header, which will prove useful to some users that have a 3rd party cooler using two fans or a water cooled option that needs the Fan and Pump connected.

Now to my first gripe, all of the other fan headers are laid out along the bottom of the motherboard.
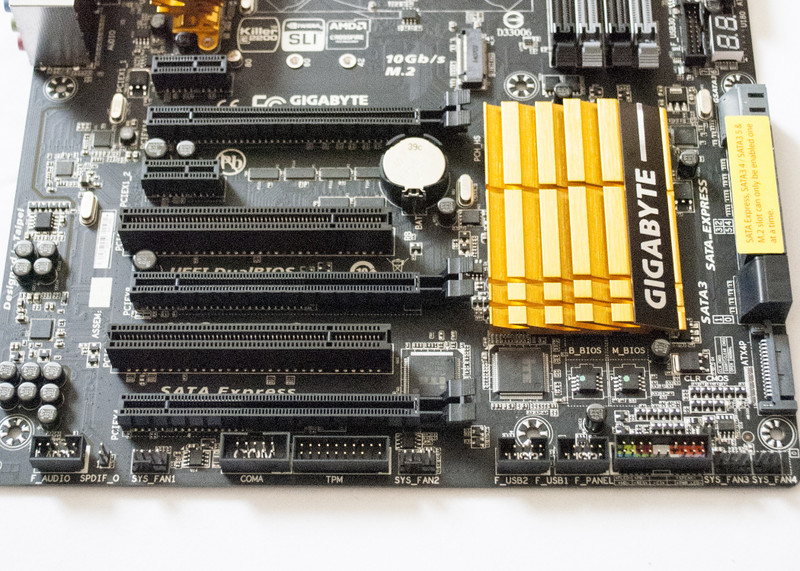
Whilst this might have seemed a good idea on paper, in practice it can make things very difficult when it comes to connecting things up, especially if your fans do not have long cables. My PC Case is a massive Xigmatek box and none of the fans mounted in the top of the chassis can be connected directly to the headers. Not a big issue for me but for some users it will be and is worth thinking about if you are planning a build with this motherboard in a large tower case.
There is an On-Board power switch along with reset and clear CMOS buttons.
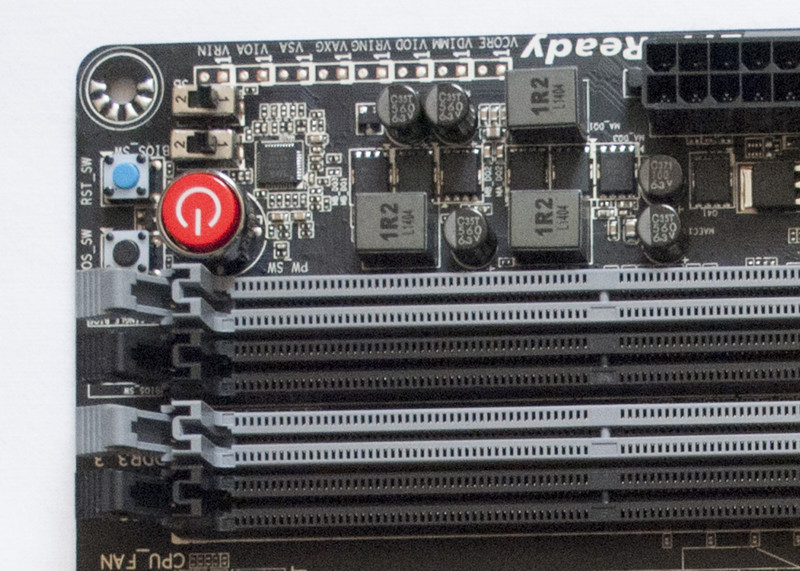
For everyday use these will never be touched but, if you are into overclocking they will prove invaluable, especially if you are running the motherboard on a test bench.
Whilst on the subject of overclocking, another great feature of this motherboard are the two BIOS switches which can be used to manually switch between the BIOS chips. A real godsend if you are tweaking away and things go wrong.
Also for those into their overclocking, there are several points on the motherboard where you can check system voltages, using a voltmeter.
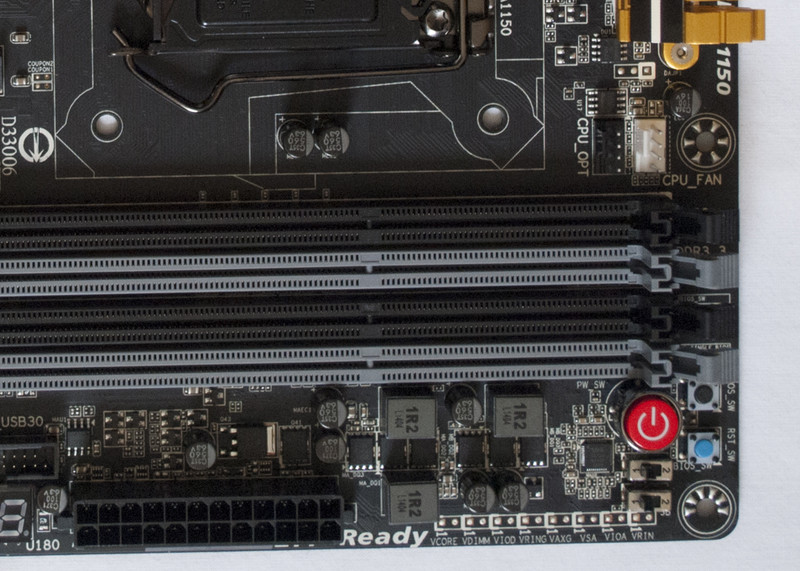
This is another really helpful feature and saves having to jump into BIOS or software programs to get these readings and being read directly from the motherboard they will be very accurate.
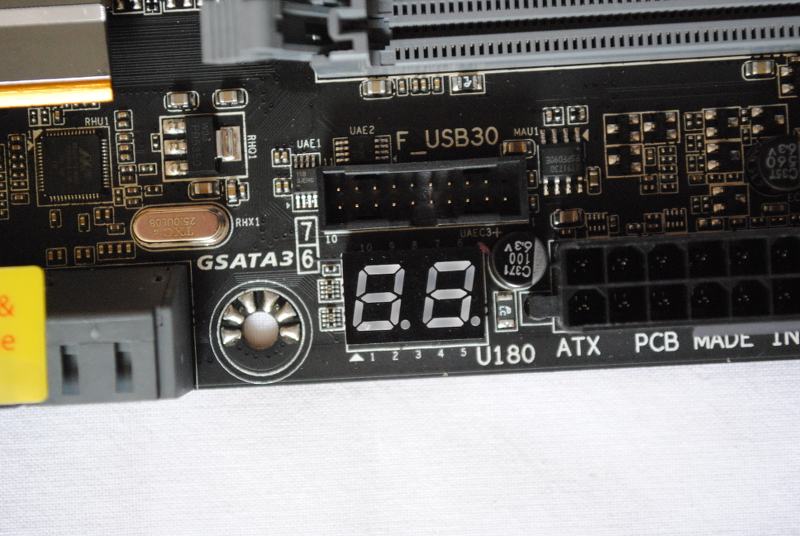
There is also an LED Debug to help overcome some of those troublesome errors that can occur with any system.
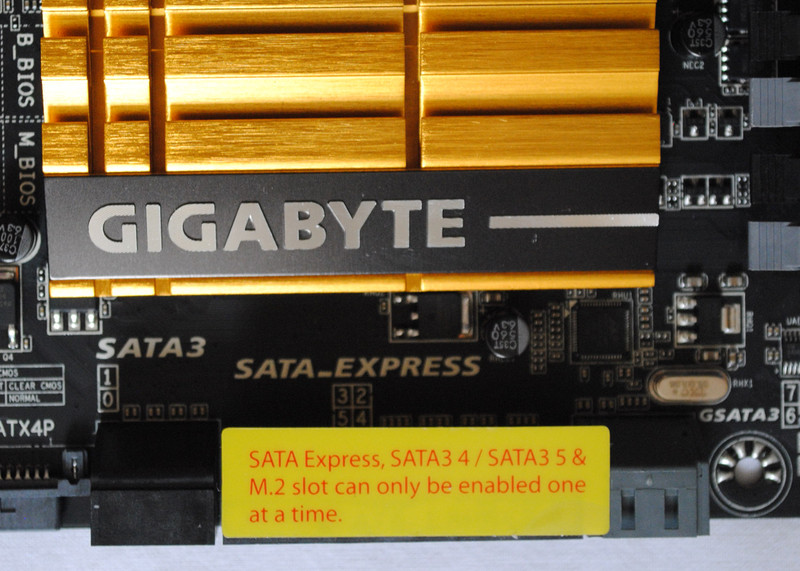
The Z97 chipset introduces us to a new option for SATA Connectivity, SATA Express and the GA-Z97X-UD5H offers both a SATA Express connector and also an M.2 SATA express slot.

This new protocol provides for faster transfer speeds than the current SATA3 6 Gb/s and new devices are becoming available to make the most of this feature.
Along with the new SATA Express connections there are also eight SATA ports, six of which are Intel and two from the Marvell 88SE9172 Chip. However, due to chipset limitations, if you connect a SATA Express device you lose the use of two of the Intel SATA ports (if I have understood things correctly) and this is something to seriously think about if you are planning on using a lot of SSD’s and/or HDD’s in your build. For most users this will not be a problem but to a minority it may be.
For network connection there are two LAN ports on the back plate one powered by Intel the other is the Qualcomm Atheros Killer E2201. These cannot be teamed (linked) so don’t try.
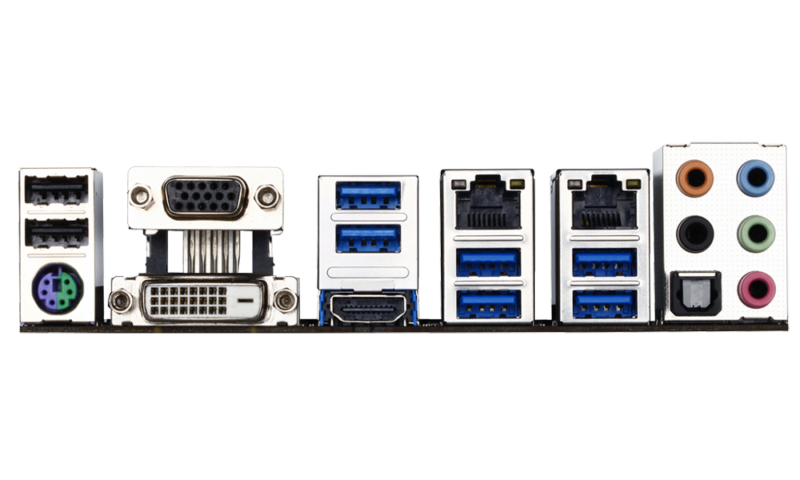
There is the usual plethora of USB ports and headers on the motherboard and there should be more than enough to cover most users’ needs.
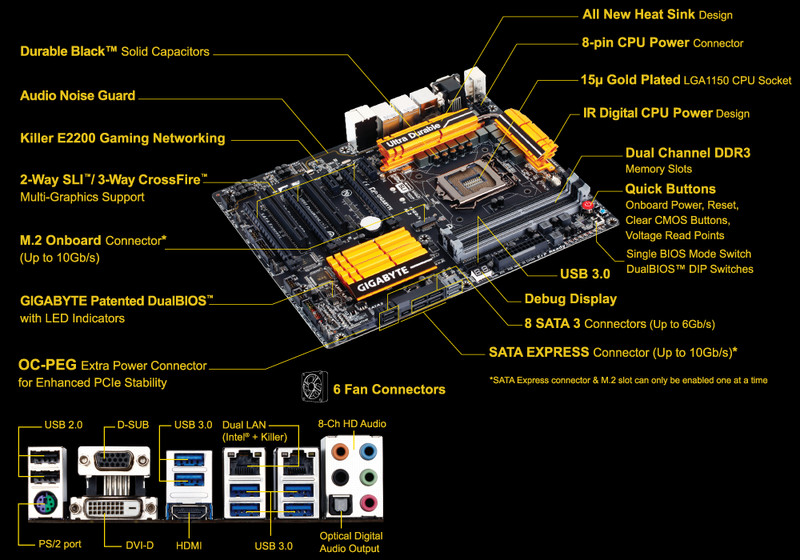
For more information on the GA-Z97X-UD5H motherboard check out the Gigabyte Microsite here:
http://www.gigabyte.com/products/product-page.aspx?pid=4950#ov it goes into more detail on specific items and probably covers things better than I can.
OK, enough of the overview, what you probably want to know is, just how good is the GA-Z97X-UD5H, when it comes to actually using it. That’s what I am hoping to cover in the next part of this review.
